Collection of research and developments on Interaction Design and immersive media from around the world. Also WIP on personal projects.
Showing posts with label 3D Printing. Show all posts
Showing posts with label 3D Printing. Show all posts
Saturday, October 17, 2020
Thursday, April 20, 2017
Thursday, April 6, 2017
Adidas with Carbon3D
Adidas partnering with Carbon3D printers. This is related to microfactories I think.
Original article here:
http://www.carbon3d.com/stories/adidas
Original article here:
http://www.carbon3d.com/stories/adidas
Monday, April 3, 2017
Instant 3D printing
If 3D printing already embezzle me, this is even better.
I'm also including the original article here. Very interesting:
xbox-cofounder-seamus-blackley-takes-rd-post-at-augmented-reality-firm-daqri
I'm also including the original article here. Very interesting:
xbox-cofounder-seamus-blackley-takes-rd-post-at-augmented-reality-firm-daqri
Create Toys in VR with "Medium"
Using Oculus and the modelling software "Medium" to create toys and 3D print them:
Dream come true, eh? What else do you want? maybe improve the tools usability (hardware).
Dream come true, eh? What else do you want? maybe improve the tools usability (hardware).
Sunday, March 12, 2017
Stand for Tag Heuer Smartwatch Craddle
This is a work done with the help of a friend, who asked me to 3D design a stand for a Tag Heuer Smartwatch cradle, since they were non existent (at that time). Another requirement was to use the least amount of material possible.
First sketches, then some measures to the smartwatch cradle. Later 3D design in 3D software. And iterations with 3D printing.

More testing with 3D printing prototypes.

Latest prototype, already tested with the TagHeuer smartwatch:

The latest product can be 3D printed here:
First sketches, then some measures to the smartwatch cradle. Later 3D design in 3D software. And iterations with 3D printing.
More testing with 3D printing prototypes.
Latest prototype, already tested with the TagHeuer smartwatch:
The latest product can be 3D printed here:
Saturday, March 11, 2017
FrankenLamp
I decided to play Dr. Frankenstein in the world of the house hacks. With some of old remaining parts of used IKEA lamps (Hemma floor lamp and Lagra clip lamp) I assembled them together with a 3D printed part I designed. Here are the results:

If you are interested in 3D printing it, here is the part in Shapeways: FrankenLamp Adaptator.
You will have to take out the clamp screw from the "Lagra" lamp and get rid of the top part of the bulb retainer in the "Hemma" lamp.
If you are interested in 3D printing it, here is the part in Shapeways: FrankenLamp Adaptator.
You will have to take out the clamp screw from the "Lagra" lamp and get rid of the top part of the bulb retainer in the "Hemma" lamp.
Wednesday, March 8, 2017
Formula 1 windshield
A die-cast car formula 1 of a 1974 McLaren, scale 1:16 had lost the windshield, in the photo below there is a reference of the original part (yellow transparent windshield):

I capture the measurements with a caliper and some reference photos with a camera. Then modeled in a 3D software and finally 3D printed. Here the result:


To celebrate the success of this piece, I'm going to watch RUSH:
To celebrate the success of this piece, I'm going to watch RUSH:
Hack your car: box for media player or smartphone
Some time ago I dismantle the central console of my Mazda 5 because I noticed it had a useless black plastic piece in the center. I removed it and 3D print with the Monoprice printer my own custom box. The measures were spot on; I love this little 3D printer. Here the results:


Friday, March 3, 2017
My latest acquisition: Monoprice 3D printer
I bought this Monoprice printer; the cheapest of the market.

I'm surprise how good is this 3D printer. Apart from a couple of initial glitches (nothing that one cannot solve from forums on the internet) is very fast and practical.
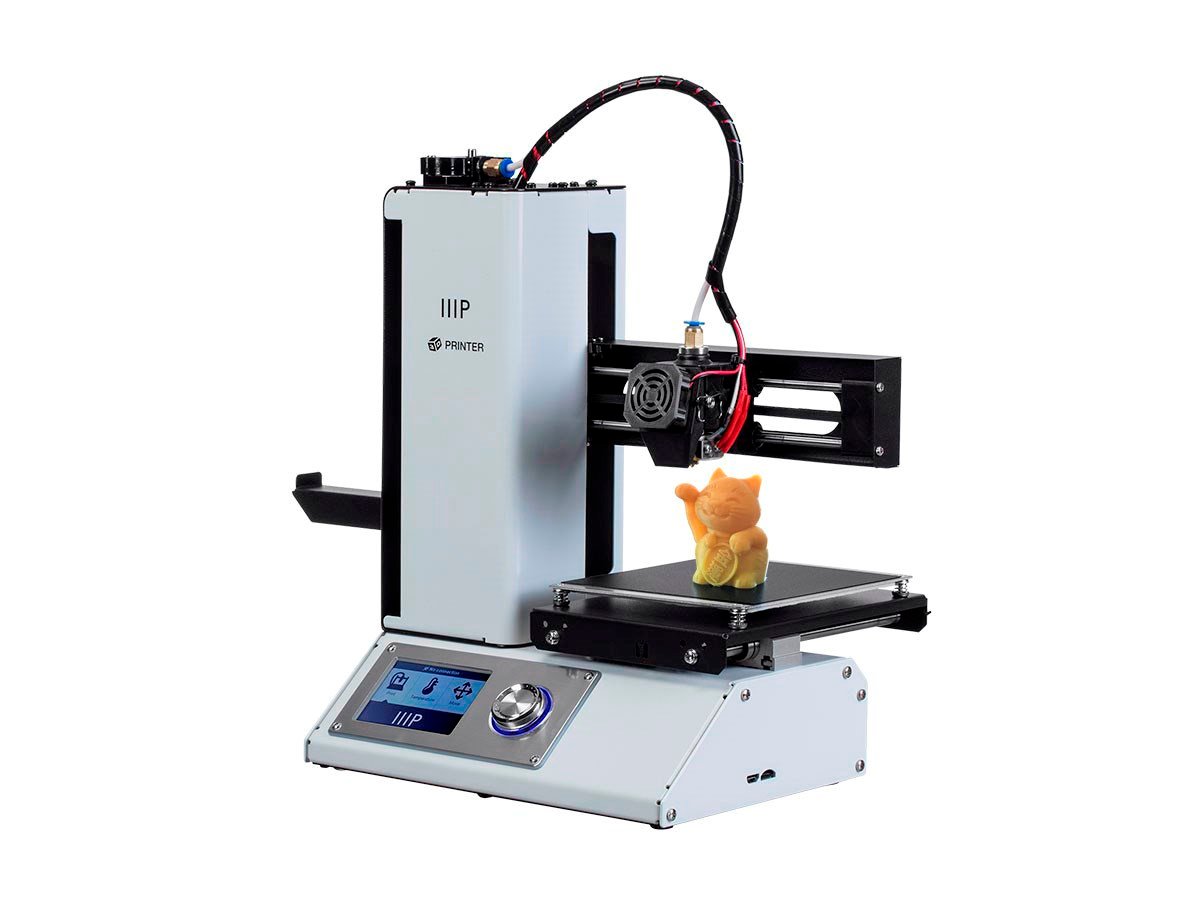
Monoprice 3D printer IIIP
I have been using it for one week. It's a great 3D printer for the price, and the resolution is not bad at all. workable fast desktop 3D printer. Recommended so far.
I'm surprise how good is this 3D printer. Apart from a couple of initial glitches (nothing that one cannot solve from forums on the internet) is very fast and practical.
Monoprice 3D printer IIIP
I have been using it for one week. It's a great 3D printer for the price, and the resolution is not bad at all. workable fast desktop 3D printer. Recommended so far.
Monday, April 4, 2016
My own "cardboard" visor
With the need of having portable VR, even more: pocket-size portable VR viewer, I had to design a bunch of viewers. This is one of the ideas I'm working with right now. 3D printed and it works pretty neat. Historical facts: I found around 5 to 10 patents of "stereoscopes" that are dated from 1950 - 1960 - 1970 including the venerable "Viewmaster".


Thursday, September 17, 2015
3D printing with the FORM1+ : more pictures
Here are more pictures with the results of printing parts for my PLAY-BIG toys collection. I also printed a vintage Lego helmet.
Here I'm adding a link to the PLAY-BIG RETRO blog if you want to see more details and pictures about the 3D print batch.


-Mercedes-Benz logo
-Unimog plate logo
-Plate
-Bumper Flag


 |
| My vintage german toys blog |
Here I'm adding a link to the PLAY-BIG RETRO blog if you want to see more details and pictures about the 3D print batch.
The highlighted zones are some of the parts reproduced in 3D printing with the FORM1+.
3D printed parts:
-wiper blade,-Mercedes-Benz logo
-Unimog plate logo
-Plate
-Bumper Flag
3D printed parts 2:
-Wrench
-Screwdriver
-Door lever or door lock
-Extra: vintage Lego Castle helmet
The helmet didn't print well: walls too thin; needs adjustment.
The flag, plate and unimog plate needs wall thickness adjustments.
The FORM1+ printer is great for this small detailed parts.
Sunday, September 6, 2015
3D printing with FORM1+ : dream come true
A friend was able to loan a 3D printer Form1+; we are going to test the resolution and the materials. Here the pictures of the set-up with a laptop.


The software is very easy to use. Initially preparing the printing process with many parts and little details here and there makes the experience a bit messy, but after a while you get use to it and then the fear of messing up goes away and the printing flows more natural and easy.
The first printing was a 10 x 10 x 10 mm cube, the cube is still holding by the supports; also the cube has to be printed in an angular position (since its the recommended way to do it, because of the peeling with the supporting base). Here some pictures of the cube:


We measured the cube and it was 9.7 (approx.) per each side. After some days, the cube measured around 9.8 ~ 9.9 mm. Pretty good in comparison to the other samples I had printed in white plastic or the metallic in other type of printers.
Then we printed another more complex sample: a my little pony figurine from Thingiverse:


We printed this figurine with the lowest quality for the sake of the speed. Not bad at all in terms of quality. By the way; initially we had a failed printed pony and we weren't sure why it failed. After a while of tinkering with the machine and making theories we figured out that in the software there is an option to select the color of the material; this feature seems to affect the final output. We had it by default on black and since we change the resin to grey, we forgot to change this option to gray in the software. We repeated the print with the right color selected and then the printing was successful.
Later my friend printed another pony with a better resolution (half way up the lever of quality), but in my personal appreciation I still cannot tell the difference between both samples. Here I added the samples for your own conclusions:


Then we went for a print batch of several pieces at the same time. I had some 3D models done previously for some vintage toys that I'm reconstructing and I wanted badly to print them on this Form1+ printer. I put some of these 3D meshes into the printer load to see how it goes. The final output is on the pictures below:


We obtained mixed results. Maybe caused by the overtime in the alcohol bucket, the pieces with the thin walls ended eaten away. I guess we will try again paying more attention to the time on the alcohol bucket step.
The software is very easy to use. Initially preparing the printing process with many parts and little details here and there makes the experience a bit messy, but after a while you get use to it and then the fear of messing up goes away and the printing flows more natural and easy.
The first printing was a 10 x 10 x 10 mm cube, the cube is still holding by the supports; also the cube has to be printed in an angular position (since its the recommended way to do it, because of the peeling with the supporting base). Here some pictures of the cube:
We measured the cube and it was 9.7 (approx.) per each side. After some days, the cube measured around 9.8 ~ 9.9 mm. Pretty good in comparison to the other samples I had printed in white plastic or the metallic in other type of printers.
Then we printed another more complex sample: a my little pony figurine from Thingiverse:
We printed this figurine with the lowest quality for the sake of the speed. Not bad at all in terms of quality. By the way; initially we had a failed printed pony and we weren't sure why it failed. After a while of tinkering with the machine and making theories we figured out that in the software there is an option to select the color of the material; this feature seems to affect the final output. We had it by default on black and since we change the resin to grey, we forgot to change this option to gray in the software. We repeated the print with the right color selected and then the printing was successful.
Later my friend printed another pony with a better resolution (half way up the lever of quality), but in my personal appreciation I still cannot tell the difference between both samples. Here I added the samples for your own conclusions:
Then we went for a print batch of several pieces at the same time. I had some 3D models done previously for some vintage toys that I'm reconstructing and I wanted badly to print them on this Form1+ printer. I put some of these 3D meshes into the printer load to see how it goes. The final output is on the pictures below:
We obtained mixed results. Maybe caused by the overtime in the alcohol bucket, the pieces with the thin walls ended eaten away. I guess we will try again paying more attention to the time on the alcohol bucket step.
Thursday, September 11, 2014
3D PRINTING THE "DIVE" FRAME
I printed the plastic frame that the DIVE website offers for free. The problem is that the printer not always is precise on the sizes. This really didn't work. I wanted to make it work, but nopes.


The printer wasn't helping much.
The printer wasn't helping much.
Subscribe to:
Posts (Atom)